How to replace a heating pressure/temperature gauge?
- Share
- Issue Time
- May 8,2017
Watch out: the actual gauge replacement itself is not usually technical difficult as long as the gauge mounting port on the boiler has not become rust damaged. But there are some serious pitfalls to watch out for - enough that for most people I'd recommend having the job done by a trained heating service tech, particularly because you might have difficulty purging all air out of the system after you get the gauge installed.
Purchase an OEM replacement part so that we won't waste time trying to jury-rig something that does not fit on your boiler.
OR
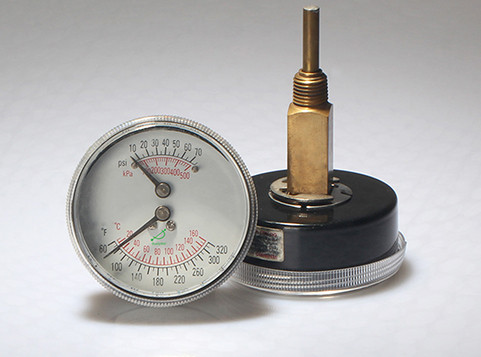
Purchase a generic replacement boiler gauge: Examine the original gauge carefully to note its operating range and importantly, the size of the pipe-treaded tapping into which the replacement guage will mount. You should be able to find a generic standard or an OEM replacement gauge set from your local heating supplier or from the boiler manufacturer. With the new gauge checked for a match, prepared with teflon tape or pipe dope as needed, the general procedure that an HVAC tech would follow would be as follows:
Turn off electrical power to the boiler - just using the service switch at the boiler should be fine
Let the heating system completely cool down to room temperature
If there are valves that isolate the various zones, close them (that may save leaking air into the zones and leaving them airbound).
Close the water supply valve to the boiler - usually the boiler water shutoff is just ahead of the automatic water feeder
Attach a drain hose to the boiler drain and run it outside or to a floor drain
Open the boiler drain to drain water pressure off of the system.